|
Salyut 6 Credit: © Mark Wade. File Name: salyut6c.jpg. Image width: 322 pixels. Image height: 239 pixels. Image size: 15,392 bytes. |
 |
Salyut 6 Detail Credit: © Mark Wade. File Name: Salyut6d.jpg. Image width: 809 pixels. Image height: 261 pixels. Image size: 59,678 bytes. |
 |
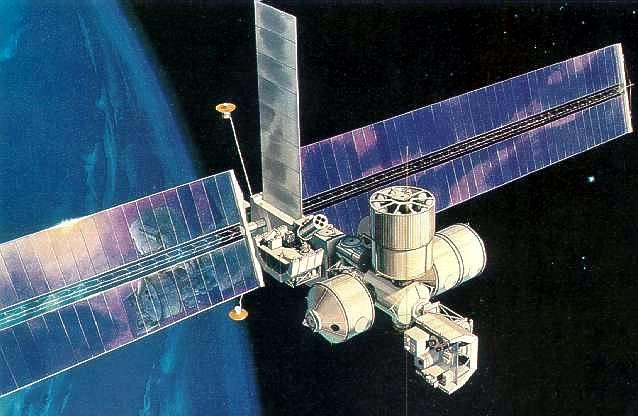
Salyut 7 Credit: © Mark Wade. File Name: salyut7.gif. Image width: 308 pixels. Image height: 427 pixels. Image size: 3,908 bytes. |
 |
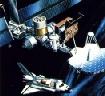
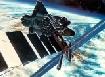
Soviet Platform 85 Soviet artists concept of orbital plarform incorporating the Salyut 7 station, 1985
Credit: DoD via Marcus Lindroos. File Name: salyut85.jpg. Image width: 632 pixels. Image height: 480 pixels. Image size: 55,502 bytes. |
 |
SAMSP This illustration from 1981 depicts the assembly of a large telecommunications antenna (right) at the Science & Applications Manned Space Platform.
Credit: NASA via Marcus Lindroos. File Name: samps.jpg. Image width: 524 pixels. Image height: 480 pixels. Image size: 44,292 bytes. |
 |
SAMSP SAMSP could gradually evolve into a manned space station by adding pressurized crew modules derived from Spacelab. McDonnell-Douglas illustration from 1981.
Credit: NASA via Marcus Lindroos. File Name: samps32.jpg. Image width: 638 pixels. Image height: 416 pixels. Image size: 45,676 bytes. |
 |
Sanger 2 Spaceplane Credit: Mark Lindroos. File Name: sanger2r.jpg. Image width: 527 pixels. Image height: 120 pixels. Image size: 8,899 bytes. |
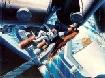 |
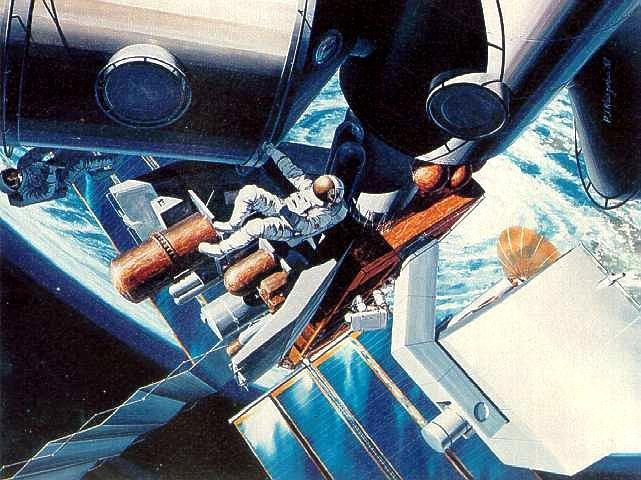
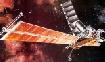
SAMSP 1982 SAMSP. This TRW illustration from 1982 depicts two astronauts doing repairs outside the Science & Applications Manned Space Platform.
Credit: NASA via Marcus Lindroos. File Name: sap82trw.jpg. Image width: 641 pixels. Image height: 480 pixels. Image size: 62,548 bytes. |
 |
SAMSP 1981 SAMSP. This McDonnell-Douglas illustration from 1980 depicts the basic unmanned platform equipped with a small Spacelab telescope pallet. The platform would provide power, communications, thermal control and other services for standard Shuttle payload experiments -- it essentially served as a surrogate Shuttle payload bay. Credit: NASA via Marcus Lindroos. File Name: sapmcd81.jpg. Image width: 631 pixels. Image height: 480 pixels. Image size: 50,984 bytes. |
 |
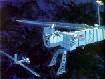
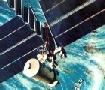
SAMSP TRW SAMSP. NASA/Marshall issued a number of Science & Applications Manned Space Platform contracts to McDonnell-Douglas and TRW in 1980. This TRW illustration from 1981 depicts a unmanned platform being serviced by a Space Shuttle.
Credit: NASA via Marcus Lindroos. File Name: saptrw36.jpg. Image width: 640 pixels. Image height: 471 pixels. Image size: 69,605 bytes. |
 |
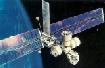
SAMSP / HST SAMSP and Hubble Space Telescope. This illustration shows three SAMSPs in different Earth orbits. One mission would be to service spacecraft such as the Hubble Space Telescope (bottom)
Credit: NASA via Marcus Lindroos. File Name: sasphst.jpg. Image width: 526 pixels. Image height: 480 pixels. Image size: 48,873 bytes. |
 |
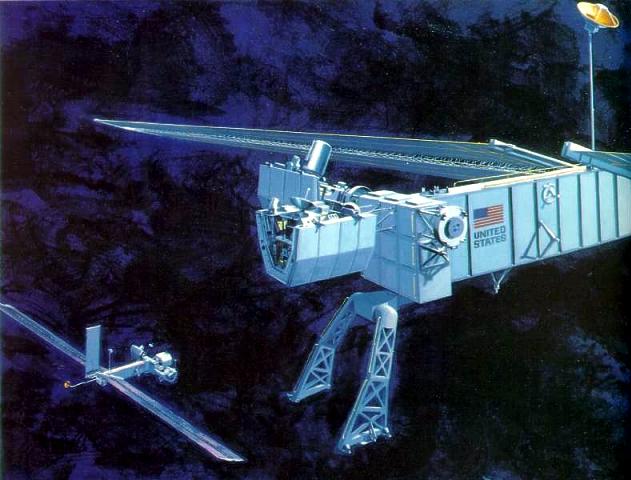
SAMSP TRW SAMSP. This unmanned TRW platform from 1981 carries three Spacelab unpressurized experiment pallets, including a space telescope. Two large solar panel "wings" generate power while the radiator on top radiates away excess heat produced by the experiments.
Credit: NASA via Marcus Lindroos. File Name: sasptrw2.jpg. Image width: 640 pixels. Image height: 380 pixels. Image size: 58,316 bytes. |
 |
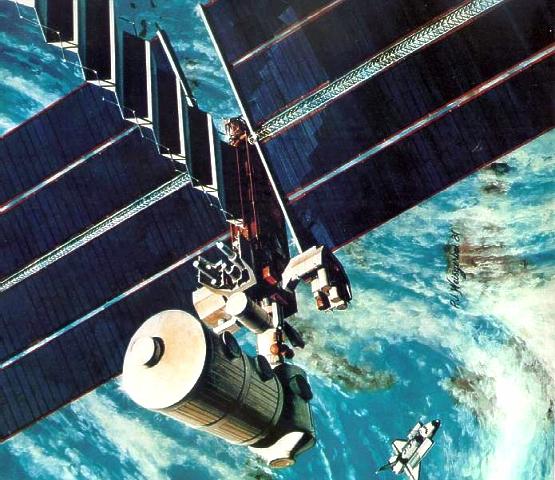
SAMSP TRW SAMSP. The TRW platform could be transformed into a human tended microgravity laboratory by adding Spacelab pressurized modules. These contain sensitive experiments which are replaced on regular intervals by visiting Space Shuttles (bottom).
Credit: NASA via Marcus Lindroos. File Name: sasptrw4.jpg. Image width: 555 pixels. Image height: 480 pixels. Image size: 62,187 bytes. |
 |
SASSTO SASSTO - Saturn-derived SSTO Cutaway
Credit: © Mark Wade. File Name: sasstcut.gif. Image width: 401 pixels. Image height: 418 pixels. Image size: 6,097 bytes. |
 |
SASSTO SASSTO - Saturn-derived SSTO Launch Vehicle
Credit: © Mark Wade. File Name: sassto.gif. Image width: 162 pixels. Image height: 412 pixels. Image size: 2,519 bytes. |
 |
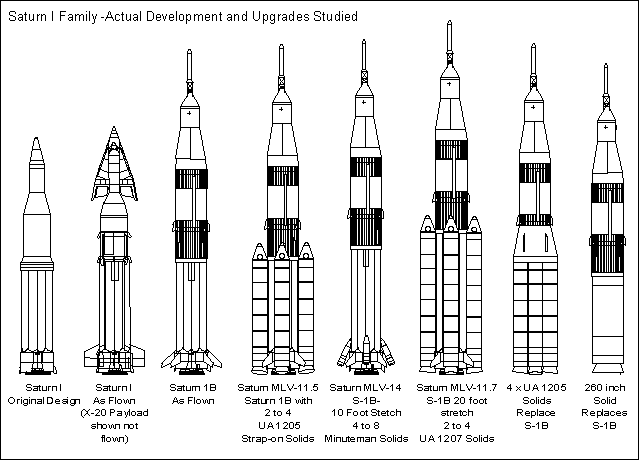
Saturn 1B/120-5 seg Saturn 1B with 120 inch 5 segment strapon
Credit: © Mark Wade. File Name: sat115.gif. Image width: 135 pixels. Image height: 698 pixels. Image size: 4,715 bytes. |
 |
Saturn 1B/120-7 seg Saturn 1B with 120 inch 7 segment strapon
Credit: © Mark Wade. File Name: sat117.gif. Image width: 135 pixels. Image height: 760 pixels. Image size: 5,188 bytes. |
 |
Saturn MLV 1.37 Credit: © Mark Wade. File Name: sat137.gif. Image width: 135 pixels. Image height: 760 pixels. Image size: 5,187 bytes. |
 |
Saturn 1B/4 SRBs Saturn 1B with 4 solids replacing S-1B
Credit: © Mark Wade. File Name: sat14s.gif. Image width: 97 pixels. Image height: 710 pixels. Image size: 3,244 bytes. |
 |
Saturn 1 Saturn 1 - COSPAR 1965-009
File Name: sat16509.jpg. Image width: 162 pixels. Image height: 463 pixels. Image size: 20,594 bytes. |
 |
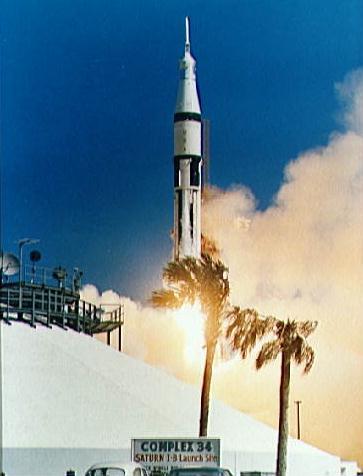
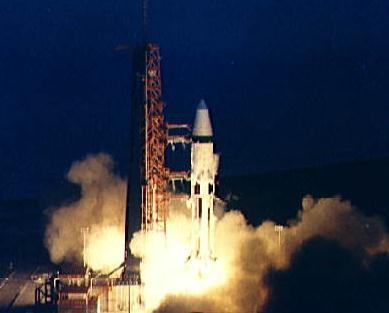
Saturn 1B LC34 Credit: NASA. File Name: sat1bl34.jpg. Image width: 363 pixels. Image height: 476 pixels. Image size: 21,748 bytes. |
 |
Saturn 1B LC39 Credit: NASA. File Name: sat1bl39.jpg. Image width: 374 pixels. Image height: 474 pixels. Image size: 25,656 bytes. |
 |
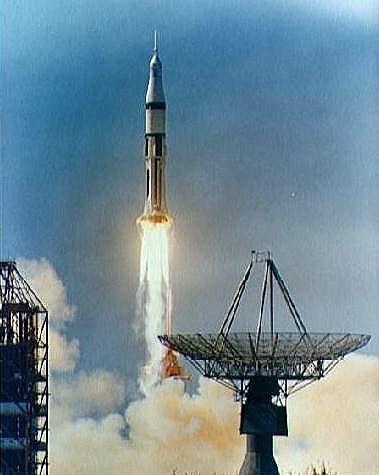
Saturn 1B with LM Saturn 1B with LM Payload
Credit: NASA. File Name: sat1blm1.jpg. Image width: 389 pixels. Image height: 313 pixels. Image size: 12,819 bytes. |
 |
Saturn 1B rad Credit: NASA. File Name: sat1brad.jpg. Image width: 379 pixels. Image height: 475 pixels. Image size: 23,081 bytes. |
 |
Saturn 1 Geneology Credit: © Mark Wade. File Name: sat1gen.gif. Image width: 639 pixels. Image height: 460 pixels. Image size: 15,026 bytes. |